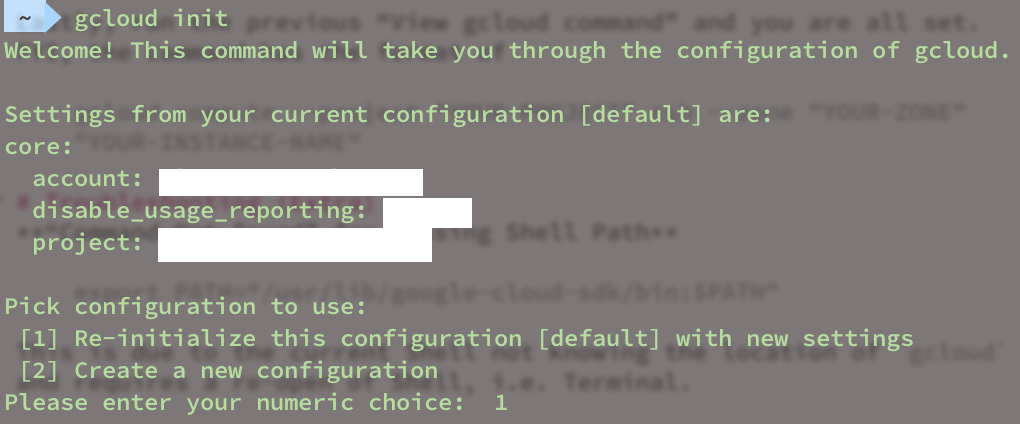
Configure Graphical UI access to VMs on Google Compute Engine
Overview
Google Compute Engine is an Infrastructure as a Service (IaaS) component of the Google Cloud Platform (GCP) and aiming to provide specific hardware and utilize the cloud environment for development as well as production.
With Compute Engine, an instance could be generated with a couple of clicks with “a custom Machine Types optimized for your specific needs”. This is a great tool alongside with Docker, Kubernetes, etc. and is a game changer in the software industry and definitely a must-have tool.
Prerequisite
If you have already created your own VM instance, well done ! This is the next part to setup a Graphical User Interface (GUI) for your virtual computer.
VM setups
There are two essential components required in order for this to work includes a desktop environment and the Virtual Network Computing (VNC) tool.
Both can be installed via the Command Line Interface (CLI) from our previous SSH session (If you forgot, don’t worry ! Refer to “how to SSH into your vm instance”).
Install Desktop Environment
A CLI is differentiated based on the type of OS image and commonly is a Terminal, Console or some specific application with Shell (an interface) on it.
1
2
sudo apt-get update
apt-get install xfce4
sudo <Admin Privilege> ; install, update <Command>
apt-get: Package Manager, Others: aptitude; yum
xfce4: Desktop Environment, Others: gnome ; KDE
Install VNC Client
1
apt-get install tightvncserver
tightvncserver: VNC Client, Others: realvnc-vnc-server
After successful installation, run command tightvncserver to initialize the server and identify the xstartup file in order to register installed desktop environment.
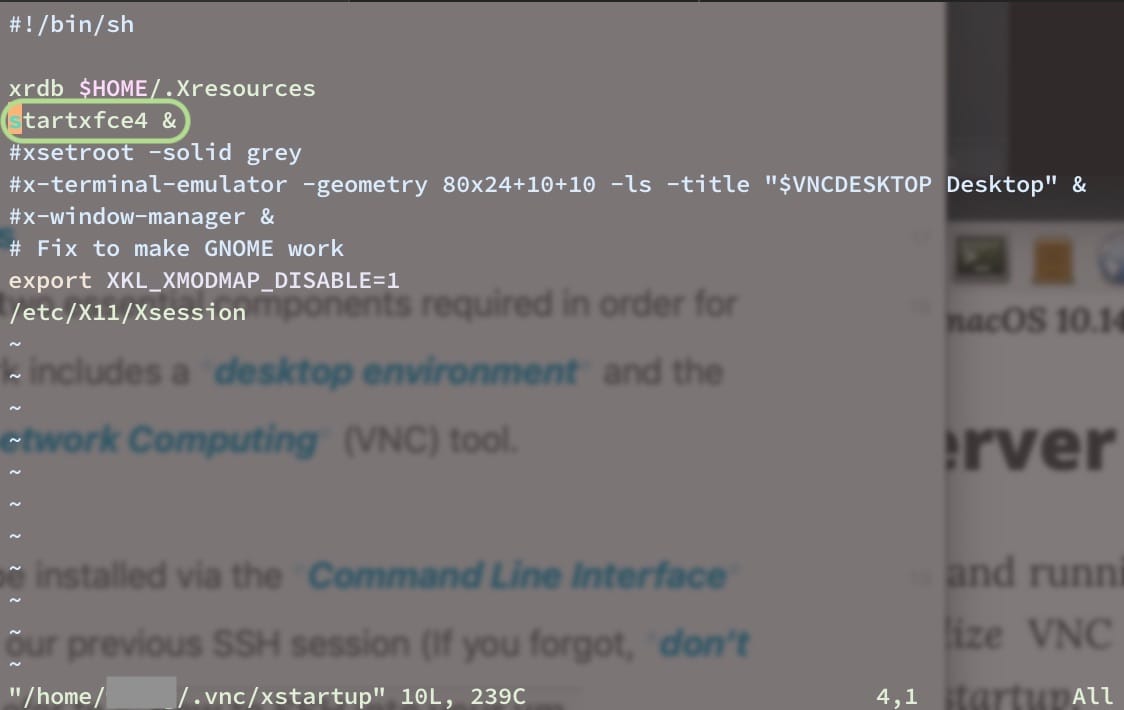 Register newly installed desktop environment in VNC server startup file.
1
sudo vim /home/user-name/.vnc/xstartup
vim: Text Editor, :wq to Save & Quit. Trust me you will need it !
Hint: The syntax is start<desktop-environment>
and an ampersand & to link with the rest of the script.
Ultimately, follow the instruction to setup credential key, this will be the access password for the upcoming VNC session.
Network Connectivity
After you have successfully installed all required components, test run the VNC server and its connectivity:
1
2
tightvncserver
nc localhost 5901
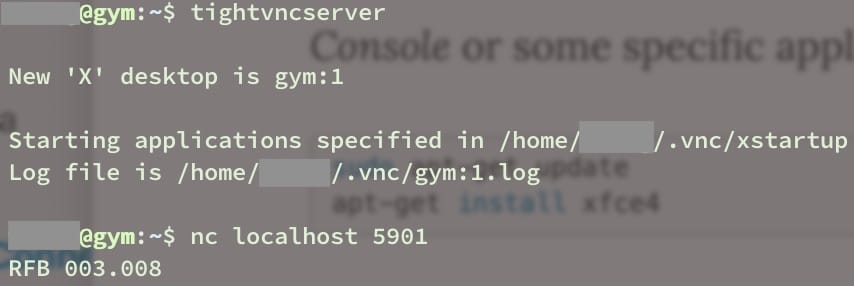 Success initialization of the VNC Server. Port <5901> returns value meaning it is listening and
 RFB indicates our server is up and running.
nc net cat <Command>. More on the command manual with man nc
<5901>: Default VNC Connection Port (5800/5900), increment 1 for every new session (next, X:2 5902, X:3 5903, etc.)
RFB: Remote Frame Buffer, this means the port is up and listening
Note: Although the server is up, the port still need to be configured forwarding to the Internet (out of the VM instance, on GCP) for remote access.
Side note: On your local computer, you can try to test the connectivity to the instance (which will be unconnected since the VNC server port is not forwarding). Hint: nc <global-ip> <port>.
Configure port for remote access
Before configure any settings, always backup or at least write down every step so that it’s easier for you to trace back later. Also, turn off VNC server and close port tightvncserver -kill: X with X essentially the number of your session.
From the Compute Engine page, go to your vm tab - click on more (at the right end) and select view network details.
From the Firewall Rules page, select Create Firewall Rule on the top bar.
Modify these fields:
- Name: default-vnc-server
- Description: instance-name ; vnc-server
- Source Filter: Select IP Range
- Source IP Range: Type “0.0.0.0/0”, allow all incoming connection
- Specified Protocol and Ports: Type “tcp:5901”, specify for VNC
Then leave the rest as default (modify only when you are sure what it does) and hit create. And voila now everything is running and establishing a connection !
Establish VNC Connection
The only step left is to find your VM External (Global) IP Address and access into it from your local computer.
- External IP from the Developer console
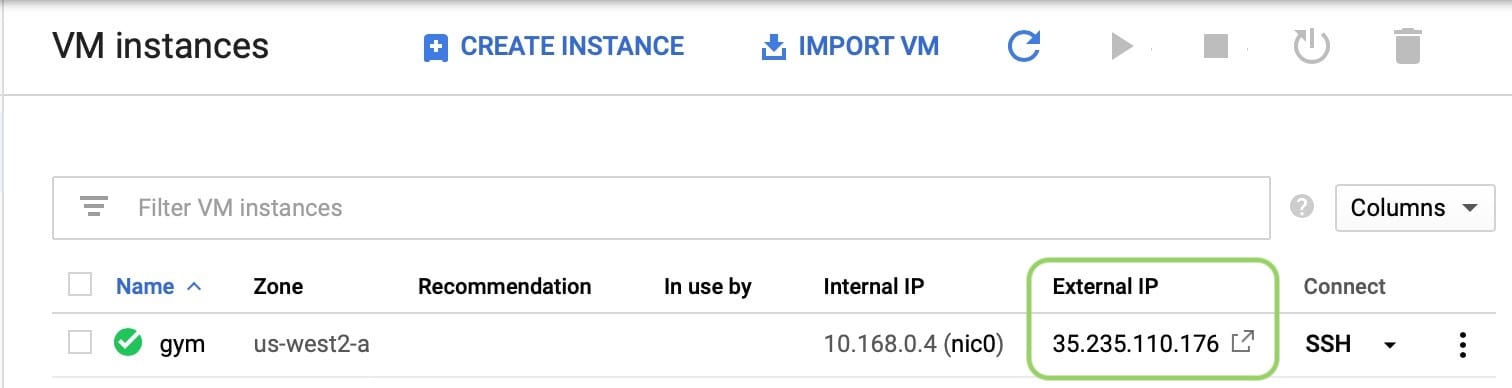 Retrieve External IP Address of your instance from Compute Engine page on the Cloud console.
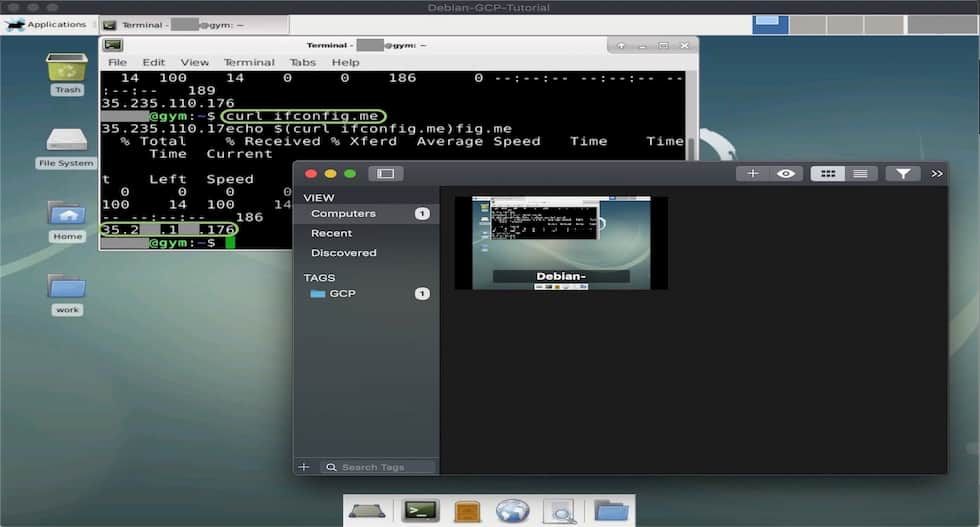
- External IP from 3rd party provider
1
curl ifconfig.me
Note: This method contains security risk for obvious reason.
Once having the External IP of your instance, access to it using any of the available VNC Viewer for your computer OS.
- Built-in VNC viewer for macOS
Every macOS computer contains a built-in VNC viewer and can be quickly activate via Finder shortcut ⌘ + K:
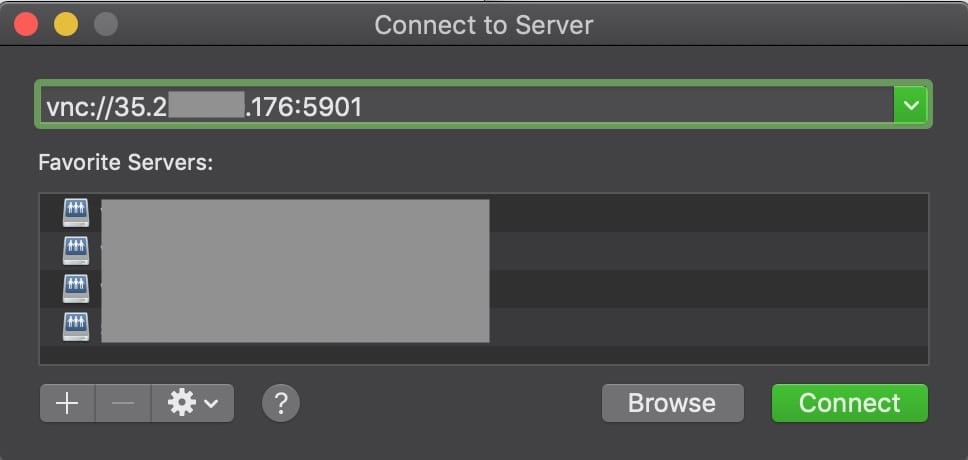 VNC session using native tool Screen Sharing on macOS 10.14.1.
Hint: The syntax is <protocol>://<global-ip>:<port>
- Third-party VNC Viewer
 VNC session using Jump Desktop on macOS 10.14.1. Others: VNC Viewer (RealVNC), Screen 4.
Troubleshooting (Extra)
- Issue with Desktop Environment configuration
Re-check if the Default Session, i.e. which DE to start up, is correct in the Display Managers: lightdm, GDM
- Forgot VNC Server Password (tightvncserver)
On vm instance, type vncpasswd into the CLI and follow instruction to reset the password.
- VNC Server port not forwarding
Re-check the Firewall settings of your computer for issue such as SSH permission, SSH tunneling config.
Also, from Compute Engine page, click on your VM and select edit. In network tag, add the default-vnc-server tag or the equivalent name that you created before.