Define Compiling workflow for Arduino sketch with Makefile
Overview
This method is a wonderful bridge between beginner and intermediate in a sense from automated script from Arduino IDE to define your very own flags to feed the compiler. That is, before you just “need to” (or to be perfectly candid “only-able-to”) hit compile button.
After this, you will be able to comprehend a concept of Makefile and further working with Makefile in raw .c and .cpp format and even with other compiler, e.g. GNU C++ Compiler (GCC).
That being said, this approach utilizes pre-defined routine from Arduino IDE itself such as board variant, microcontroller architecture to monitor port on your computer and furthermore.
Prerequisite
-
An application running Shell (Command Line Interpreter) typically Terminal on macOS.
-
A Package Manager, typically
homebrew(macOS) orapt-get,yumon a variety of Linux distros. -
A C Compiler, specifically OSX-GCC Compiler if you are on macOS which will be installed along with the Xcode application.
-
A Python interpreter and Python-specific Package Manager: pip for Python 2.7 or pip3 for Python 3.
Don’t worry if you are missing any of those !! A comprised instruction can be found
INSTRUCTION HERE
Install homebrew package manager
Copy and Paste this command into your Terminal to install homebrew.
/usr/bin/ruby -e "$(curl -fsSL https://raw.githubusercontent.com/Homebrew/install/master/install)"vim ~/.bash_profile
# Place this line into the profile
export PATH="/usr/local/bin:/usr/local/sbin:$PATH:wq to Save & Quit; Trust me you will need it. Restart Terminal for changes effect.
Install OSX-GCC Compiler
Still in Terminal, verify if you have XCode and its Command Line Tools yet.
/usr/bin/xcodebuild -versionxcode-select --installwhereis gcc
~ /usr/bin/gcc
Install Python Interpreter
Some of the toolchains have reported discrepancies with Python > 3.5 . For the sake of this tutorial, Python 2.7 will be installed instead.
brew install python@2python@2 keg directory
vim ~/.bash_profile
# Place this line into the profile
export PATH="/usr/local/opt/python@2/bin:$PATH"
Toolchain Installation
In case you are an intrinsic newbie, definitely check out the Prerequisite instruction above. Once having all the application and dependencies, the main toolchains are required to setup.
- Arduino IDE & AVR-G++ Compiler
Download the latest version of Arduino IDE from arduino.cc which includes the AVR-G++ Compiler. Drag & Drop the Arduino IDE into Application folder (important).
Once installed, the compiler can be verified by using command
1
/Applications/Arduino.app/Contents/Java/hardware/tools/avr/bin/avr-g++ --version
Note: The output should indicates compiler version and flag -v can be used to find more about it, e.g. configuration, target, thread mode and etc.
- Makefile workflow
(Recommended) Using homebrew or apt-get to install directly with command
1
2
3
brew update
brew tap sudar/arduino-mk
brew install arduino-mk
Side note: As of the time writing this article, the arduino-mk package has already been in the default homebrew 2.1.2 inventory and does not need to tap anymore.
Another way is if you are familiar with GitHub, clone the directory sudar/Arduino-Makefile and extract the .ZIP into /usr/bin/Cellar.
- PySerial tool
The Arduino IDE provides avrdude to work with uploading code to the board and by using Pyserial program, this process can be further automated.
(Recommended) Install using the pip, Package Manager for Python 2.7 package with the command.
1
pip install pyserial
Another way is to install it as a package with apt-get install python-serial.
Understanding Arduino
Now that every dependencies are satisfied, let’s take a look into how components on Arduino board and controller peripherals operated as well as compiler directive.
Hardware Level
At Hardware Level, an Arduino Board, e.g. Uno, Leonardo, Mega, etc.; typically contains a main AVR microcontroller (ATmega328p, ATmega32u4, ATmega2560 respectively) from Atmel and hence the controller names.
Beside that, a common microcontroller ATmega16u2 is usually in charge of convert between the computer’s USB port and the main controller’s serial port.
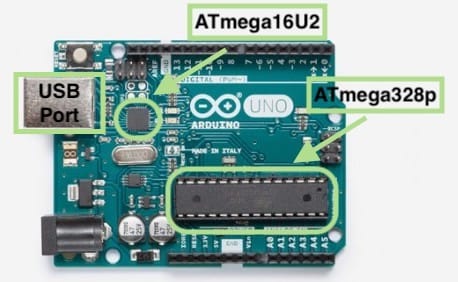 Arduino Uno and Hardware Interface between computer to the microcontroller.
This bridge is essential for uploading code from the computer to the main controller’s memory and communicating with it via serial protocol as discussed in the embedded system article.
Software Level
At Software Level, Arduino IDE provides a medium between the user and the AVR-G++ compiler. That is, it completes function pre-define, header, library linking and ultimately export machine-understandable directive, usually in .hex format.
The nature of an Arduino sketch is nothing else but C, C++ code and parameter directive as well as other “under the hood” declaration, for instance look at the way CPU clock speed defined below.
Hint: AVR-C expected param defined in the script whereas Arduino stored a default clock speed in a file and automated that for you (unless modified, of course).
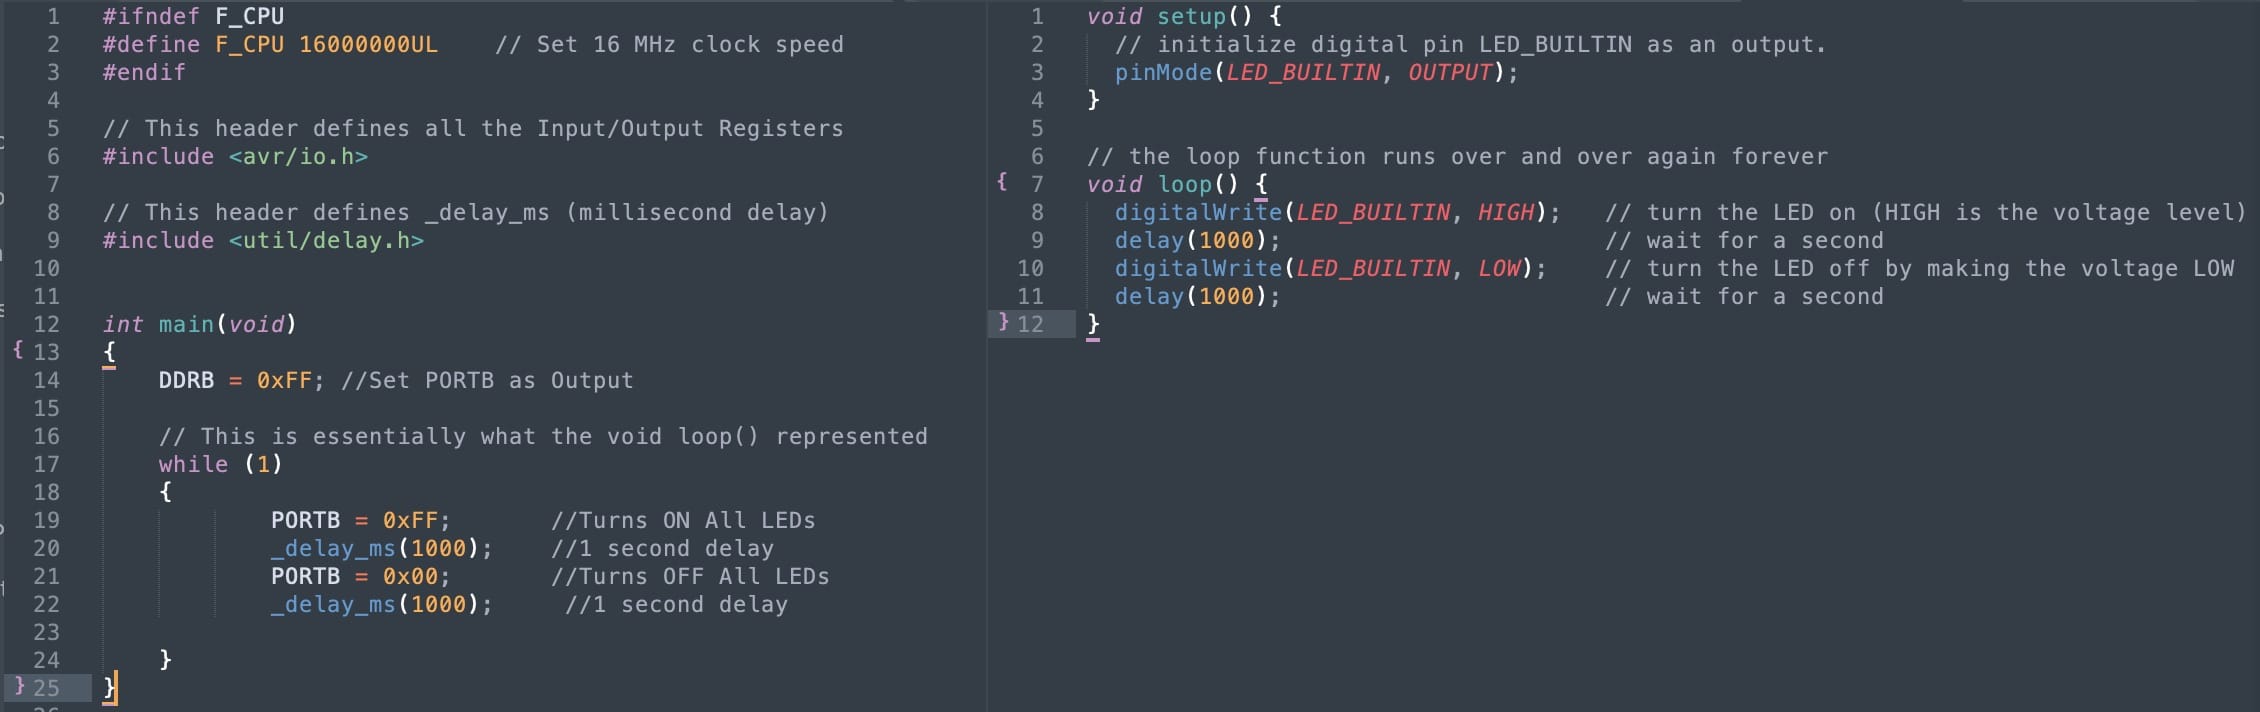 Typical AVR C script and Arduino sketch depict the same behavior, blinking LEDs every 1 second
Note: A misconception should be cleared is that the Arduino programming language is essentially the C (and C++) code compiled and not a different language.
Makefile Flags
In the Makefile, some usual parameters are defined for the board, port, user Library and one important line to include the directive Arduino.mk file.
Hint: The full list of Arduino boards, AVR microcontroller can be found inside the Arduino.app or simply make show_boards and make show_submenu respectively.
1
2
3
4
5
6
7
8
9
BOARD_TAG    = mega
BOARD_SUB    = atmega2560

ARDUINO_LIBS = SoftwareSerial

MONITOR_PORT = /dev/*.usbserial*
MONITOR_BAUDRATE = 115200

include ../../Arduino.mk
Typical Makefile script for Arduino Mega board*
Note: Full list of make commands can be found in the arduino-mk-vars.md
Side note: On macOS, the MONITOR_PORT is either tty/cu and modem/serial depend on the OS version.
Routine Usage
The usage is quite straight forward with a few commands and a Makefile in the same directory as the Arduino sketch .ino.
These commands are pretty self-explanatory using a prefix make with flags:
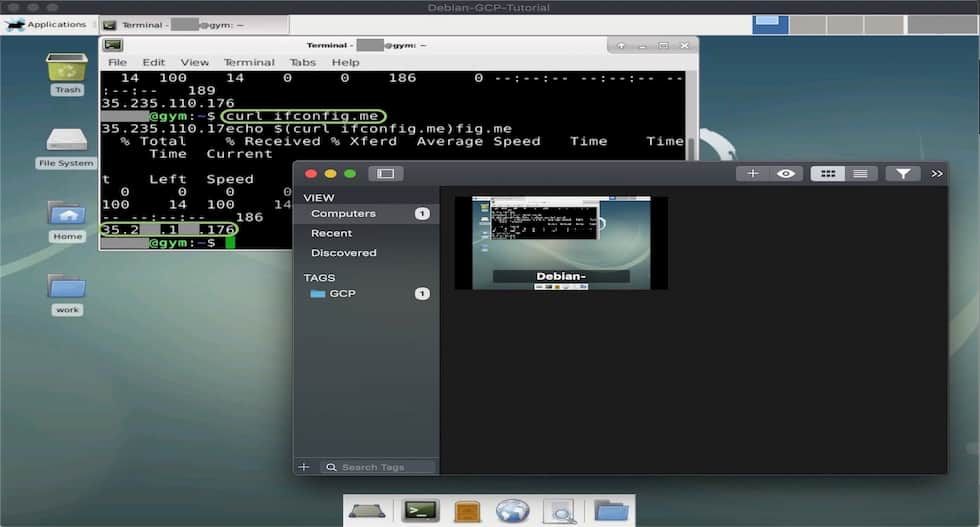
 Output of Compile-Only command
 make
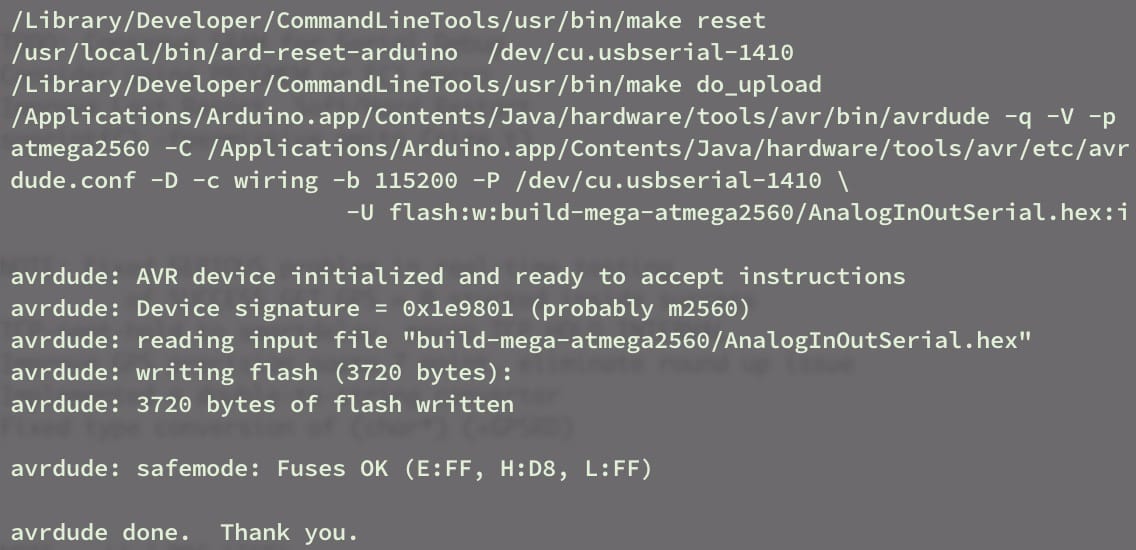 Output of Compile-and-Upload command
 make upload using PySerial to trigger reset.
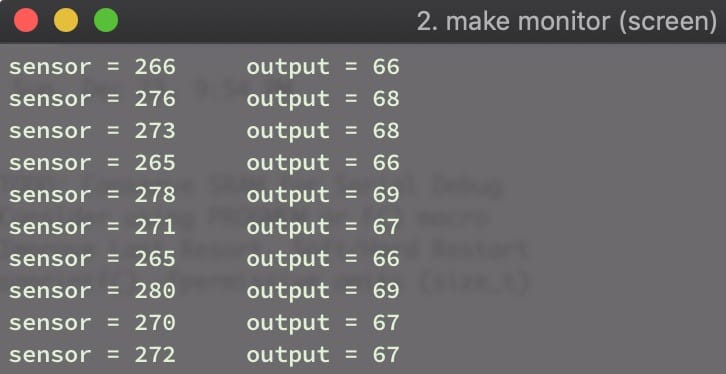 Establish serial connection command
 make monitor using native app screen on macOS 10.14.1.
Advance to AVR Development
If you are feeling confident enough, explores these new aspects:
- Compiling plain AVR C programs: Also look up Atmel Studio for an IDE with troubleshooting.
- Program using Arduino as ISP: Bootload firmware form one to another board (More on upcoming article).
- Generate assembly and symbol files: Understand more of file linking and how compiler works.
Troubleshooting (Extra)
“Command Not Found” for missing Shell Path In case of homebrew or Python commands not found, try to refresh it
1
2
export PATH="/usr/local/bin:/usr/local/sbin:$PATH”
source /.bashprofile
Or better yet, look into ~/.bashrc instead.
Python 3 and Python 2 compatibility
Python > 3.5 is NOT backwards compatible and thus some of the dependencies might be newer than wanted. One solution is to switch using homebrew.
1
brew switch python 2.7.x
Also, make sure to use the correct commands in execution, i.e. pip/pip2 or python/python2.